Search This Blog

Asian Inspired Sautéed Kale and Red Cabbage Recipe

11/16/2015 *Sara-Marie* 1 Comments


I love sautéed greens and cabbage, which I would have never known until I started eating more vegetables and greens when we started living this Whole30/Paleo lifestyle. 

If you follow me on Instagram or Facebook, you've seen a ton of variations of my sautéed cabbage and greens. I usually always add fresh garlic and some acid in the form of balsamic vinegar or fresh lemon juice (or both!) and something salty like prosciutto. 

This morning, I wanted something a little different so I ventured into making this dish with some Asian inspired flavors. The coconut aminos is a great paleo substitute for soy sauce and it takes the place of the vinegar and something salty that I usually like to add. The combination of the coconut aminos and the orange juice, garlic, and ginger really work so well together and transform this dish into something new and exciting. Topping with the sesame seeds and chopped cashews is a nice way to add some crunch and a little fat for satiety. 

I paired my sautéed veggies with a couple eggs and it was a perfect, complete meal! 

ASIAN INSPIRED SAUTÉED KALE & RED CABBAGE RECIPE

Recipe Ingredients:

1 bunch of kale, cleaned, and roughly chopped
1 cup of red cabbage, roughly chopped
1/2 red onion, small dice
2 tbsp avocado oil
Pinch or two of sea salt
1 garlic clove
1 tbsp orange juice
1 tbsp coconut aminos 
1/4 tsp pepper
1/4 tsp ginger (fresh or ground)
Small handful of chopped cashews, for topping
Sesame seeds, for topping

Recipe Directions:

1. Wash and prep your kale, red cabbage, and onion, removing stems from kale and roughly chopping everything into bite sized pieces. Make sure to dice the onion pretty small so it cooks quickly. 
2. Heat a cast iron skillet over medium heat and add about 2 tbsp avocado oil to the pan.
3. Add the red cabbage and onion, a pinch or two of sea salt,  and sauté for about 5 minutes. 
4. Add kale, garlic, orange juice, and coconut aminos and stir to combine. 
5. Continue to sauté until veggies are cooked to your liking, usually around 5-10 more minutes. I like my kale and cabbage to still have a bit of a bite to them and not too soft.
6. Season with pepper and ginger. Do a taste test and determine if a pinch of salt is in order or not. The coconut aminos should be enough, but you won't know until you taste! 
7. Top with sesame seeds and chopped cashews and enjoy! This could be enough for two servings or one serving for a hungry mama, like me!

Let me know what you think!

XOXO,
SMP

1 comments:

Thrive Market - My New Favorite Way to Shop & Save!

11/15/2015 *Sara-Marie* 0 Comments

http://go.thrv.me/aff_c?offer_id=6&aff_id=7914

Last week I announced how excited I am to be partnering with Thrive Market to bring all of you the best in healthy living products - at 25-50% off retail value! And the excitement continues :)

(Check out the link at the bottom of this page, for how to save even more!)

For those that don't know, Thrive Market offers the best-selling natural and organic products at wholesale prices.

THINK COSTCO MEETS WHOLE FOODS, ONLINE!

Ever since we started on our paleo/real food journey, we noticed our grocery bill start to climb as we were looking for the highest quality products out there to support our health. Along with the grocery bill was the gas bill, because I was often driving further away from home and to multiple natural food stores, looking for specialty items. Well now, Thrive Market is here to solve both of those problems. Now, I can shop in my pajamas, at any time of day, and pay wholesale prices for things like coconut butter and grassfed collagen! It really is a win-win!

http://go.thrv.me/aff_c?offer_id=6&aff_id=7914
  

So how does Thrive Market work?

It's pretty simple actually. 

On Thrive Market you can shop the best-selling health and wellness products from the top natural brands on the market in everyday sizes, always at 25-50% below traditional retail prices.

Thrive Market members do pay a low annual fee of $59.95 (that’s less than $5 a month). This membership model allows them to sell the best healthy products at true wholesale prices and pass all the savings directly to members. In my first order, I've already saved the amount I paid in the membership, so I know this will be a huge benefit for the rest of the year.

And they don't just have random stuff either - Thrive Market makes it easy to get everything you need in one place. They have GMO-free food, snacks, vitamins, supplements, personal care products, cleaning supplies, beauty products, kitchen staples, pantry essentials, baby food and products and much, much more. I've only really scratched the surface in browsing their available products. 

Want to know the coolest part of this all? For every paid membership, Thrive Market donates a free membership to a low income American family so we can all thrive together. So. Awesome. 

But what about shipping? Isn't that going to cost me a fortune? 

Nope! On every order $49+, shipping is FREE. Always! 

Want to give it a try, but don't really want to commit to a yearly membership just yet? 

No fear! 

By visiting Thrive Market using any of the links in this blog post, you can get a free 30 day trial membership! And the clock doesn't start ticking until your first order is placed! So you can browse for a few days without it counting towards your 30 days, which is exactly what I did :). 

Anything else I should know?

Yes! You will also receive 25% off your first purchase, so make that first purchase a good one! 


http://go.thrv.me/aff_c?offer_id=6&aff_id=7914


0 comments:

Herb Roasted Vegetables with Homemade Pork Sausage Recipe

11/14/2015 *Sara-Marie* 2 Comments

This recipe is such an easy and delicious meal that can be whipped up on meal prep nights and enjoyed the rest of the week, at any time of day! On its own or topped with an over easy egg for breakfast, it's all good.

Herbes de Provence is my absolute favorite seasoning blend for roasted vegetables. I literally put that on any vegetable and it tastes SO GOOD.

This would also make a wonderful side dish for your upcoming Thanksgiving or Christmas meals! 

Herb Roasted Vegetables with Homemade Pork Sausage Recipe
*FOR THE VEGGIES*

Recipe Ingredients:

1 medium butternut squash, peeled and diced
2-3 apples, diced
2-3 carrots, diced
1 red onion, diced
1 tbsp Herbes de Provence
1 tsp sea salt
1 tsp or more ground cinnamon
1/2 tsp pepper
1/2 tsp garlic powder
Avocado oil or cooking fat of choice

Recipe Directions:


1. Preheat oven to 400 degrees F.
2. Dice up the butternut squash, apples, carrots, and onion.
3. Toss with avocado oil (or cooking fat of choice) and season to taste (or use general guidelines above) with sea salt, black pepper, garlic powder, Herbes de Provence, and ground cinnamon.
4. Roast for about 30 minutes.

*FOR THE HOMEMADE PORK SAUSAGE*

Recipe Ingredients:

1 lb ground pork
1 tsp sea salt
1 tsp black pepper
1 tsp ground mustard
1 tsp ground sage
1 tsp paprika
1 tsp Avocado oil or cooking fat of choice

Recipe Directions:

1. While the veggies are roasting, heat a skillet over medium heat and add a bit of cooking fat (as ground pork can be pretty lean) and the ground pork.

2. Crumble with a wooden spoon and season with 1 TSP each of sea salt, black pepper, ground mustard, ground sage, and paprika.

3. Continue to cook until no longer pink and cooked through.


Once the vegetables are done roasting and the ground pork sausage is cooked, combine both into a bowl and enjoy!

Until next time,
SMP

2 comments:

Quick Burn At Home Workout: 21-15-9

9/05/2015 *Sara-Marie* 0 Comments


Looking for a quick workout to do at home? I just completed this little full body burner during Isabelle's nap and I feel good! The objective is to complete this as quickly as possible, completing 21 reps of each exercise, then 15 reps each, then 9 reps each. I finished in 2 mins and 40 seconds and I was sweating!

 If you want a little more, you could take a 1 minute break, and do it all over again and try to finish faster than your first round. I did take the time to complete a warm up (jumping jacks and mountain climbers) and finished up with some stretching. 

Give this quick burn workout a try and post your time in the comments. It should only take a few minutes - you could even do it while you're waiting for your lunch to warm up! 

XOXO, 
SMP

0 comments:

Balsamic Lime Roasted Chicken Recipe

8/29/2015 *Sara-Marie* 1 Comments


"Hmm, I could really go for some Balsamic Chicken," I thought to myself one day as I quickly looked through my kitchen to see what ingredients I had on hand. I didn't have what I needed for my Pomegranate Balsamic Chicken but I had enough to hopefully make something delicious. I also only had a pack of bone-in split chicken breasts and drumsticks so I knew my typical method of cooking on the stove top wasn't going to work. Lo and behold, this recipe was born and it was so incredibly delicious. The fresh lime at the end adds a subtle zing that I loved. Isabelle, my almost 2 year old, also couldn't stop asking for more.

BALSAMIC LIME ROASTED CHICKEN

Recipe Ingredients 
About 4 lbs of bone-in chicken pieces (I used 2 split breasts and 4 drumsticks)
1/2 cup balsamic vinegar
1/4 cup olive oil
1/4 cup Dijon mustard
3 garlic cloves, minced
1 TSP salt
1 TSP pepper
2 sprigs of fresh rosemary, finely chopped 
1 lime, juiced 
Chopped fresh basil, to garnish

Recipe Directions
  1. Preheat oven to 400 degrees F. 
  2. Prepare marinade by whisking together the balsamic vinegar, olive oil, Dijon mustard, garlic, salt, pepper, and rosemary.
  3. In a large baking dish or roasting pan, add your chicken pieces. Pour marinade over chicken and toss to coat.
  4. Roast the chicken uncovered for about 45 minutes, until just cooked through.
  5. Carefully transfer the chicken to a clean plate and again, very carefully pour the remaining cooking liquid left in the pan into a small saucepan. If you have a lot of excess oil, you'll want to skim from the top. 
  6. Add in the juice from one lime and boil until the sauce reduces by about half and thickens to coat the back of a spoon. This can take about 6-8 minutes.
  7. Pour the balsamic lime reduction over the chicken and sprinkle with fresh basil.
Enjoy!

Until next time,
SMP

1 comments:

Creamy Beet Salad with Basil Mint Dressing

7/04/2015 *Sara-Marie* 1 Comments


Gorgeous beets are in season right now and if you're thinking of a new way to enjoy these nutritious and colorful vegetables, then this recipe is for you. Beets are an excellent source of folate, and a good source of manganese, potassium, copper, fiber, magnesium, phosphorus, vitamin C, iron, and vitamin B6. They are also a healthy dose of carbs, if you're looking to add some variety to your real food plate. So pick up a bundle or two during your next trip to the farmers market and bring this salad to your next summer cookout. Or eat it all yourself in the comfort of your home. Both options are totally acceptable.

Now this beet salad is super simple and the key is the creamy, flavorful dressing. The dressing is based on Planks, Love, and Guacamole's ranch dressing (which I LOVE and make every week!), but I add lots of fresh basil and mint for a unique flavor combination.

Creamy Basil Mint Dressing
Based on Planks, Love, and Guacamole's "Best Ranch Dressing EVER"

Recipe Ingredients:
2/3 cup of light tasting olive oil
1 egg
2 tbsp red wine vinegar
1/2 tsp salt
1/2 tsp black pepper
1/2 tsp onion powder
1/2 tsp garlic powder
handful of fresh basil
handful of fresh mint

Recipe Directions:
1. In a wide-mouth mason jar, add the egg and red wine vinegar. Let sit for 15-30 minutes to bring the egg to room temp.
2. Add spices and herbs to the jar and blend, using a stick immersion blender for about 30 seconds.
3. Measure out 2/3 cup of LIGHT TASTING olive oil and slowly add to the jar while you keep the immersion blender going. Within a couple of minutes, you should have a beautiful emulsion resulting in a creamy, delicious dressing. Taste test and add more herbs, if a stronger flavor is desired.

Creamy Beet Salad with Basil Mint Dressing Recipe

Recipe Ingredients:
3 large beets
2 tbsp Creamy Basil Mint Dressing (see above)
water, for boiling
1/2 tbsp of fresh mint, chopped
1/2 tbsp of fresh basil, chopped
pinch of salt

Recipe Directions:
1. Chop off the beet greens and save for later*. Thoroughly wash beets, but you don't have to peel them yet.
2. In a large pot, boil the beets until fork tender. This could take anywhere from 45 - 75 minutes, depending on the size of the beets. I usually start testing at minute 45 and then every 15 minutes after that until cooked through.
3. Carefully transfer the beets to cold water to speed up the process of being able to handle them safely, without burning yourself.
4. Using a bunch of paper towels, carefully rub off the skin of the beets. The skin should easily come off and into the paper towels, without turning your hands bloody red.
5. Once peeled, dice up beets and place into a large bowl. Add about 2 tbsp of the Creamy Basil Mint Dressing and stir. Feel free to add more dressing, if you'd like.
6. Stir in the fresh herbs, saving a bit for garnish on top. Add a pinch or two of salt and you should be good to go!
7. Enjoy!

 *I will be posting a delicious recipe for sauteed beet greens soon. Think bacon and garlic! Yum!

XOXO,
SMP


1 comments:

Paleo Sesame Chicken Recipe

4/11/2015 *Sara-Marie* 57 Comments


I've always had a soft spot for Chinese takeout, but ever since we started following a Whole30/Paleo diet, we have limited our intake to very infrequent occasions. It would always taste great in the moment, but later on we would feel sick to our stomach and wonder why we ordered it to begin with. This recipe, however, is equally delicious and leaves you feeling great and ready to continue on your health journey with no interruptions, no tummyaches, and no guilt.

The last couple of weeks I've been experimenting with using Coconut Aminos to create a clean, guilt free sauce I could use for quick stir fry dinners. The taste reminded me of Chinese takeout so I started to research how to make "Chinese Style Chicken" recipes like sweet and sour, orange, and sesame chicken. I took a little bit from a couple of different recipes and landed with this deliciously clean, Paleo, and Whole30* approved version of what reminds me of Sesame Chicken. 

*If you have a serious obsession with Chinese takeout, this could be considered "swypo", as per the Whole30 guidelines. To me, it's just a healthier version of a popular dish and I would have no problem eating it during a Whole30 along side plenty of veggies or over some salad greens. Your call though.

The method to making this dish taste legit may sound a little labor intensive, but it's actually quite easy. I decided to show the steps in pictures, so you can get a good idea of what is happening along the way. Succinct instructions will follow at the end :)

Paleo Sesame Chicken Recipe - Step by Step!

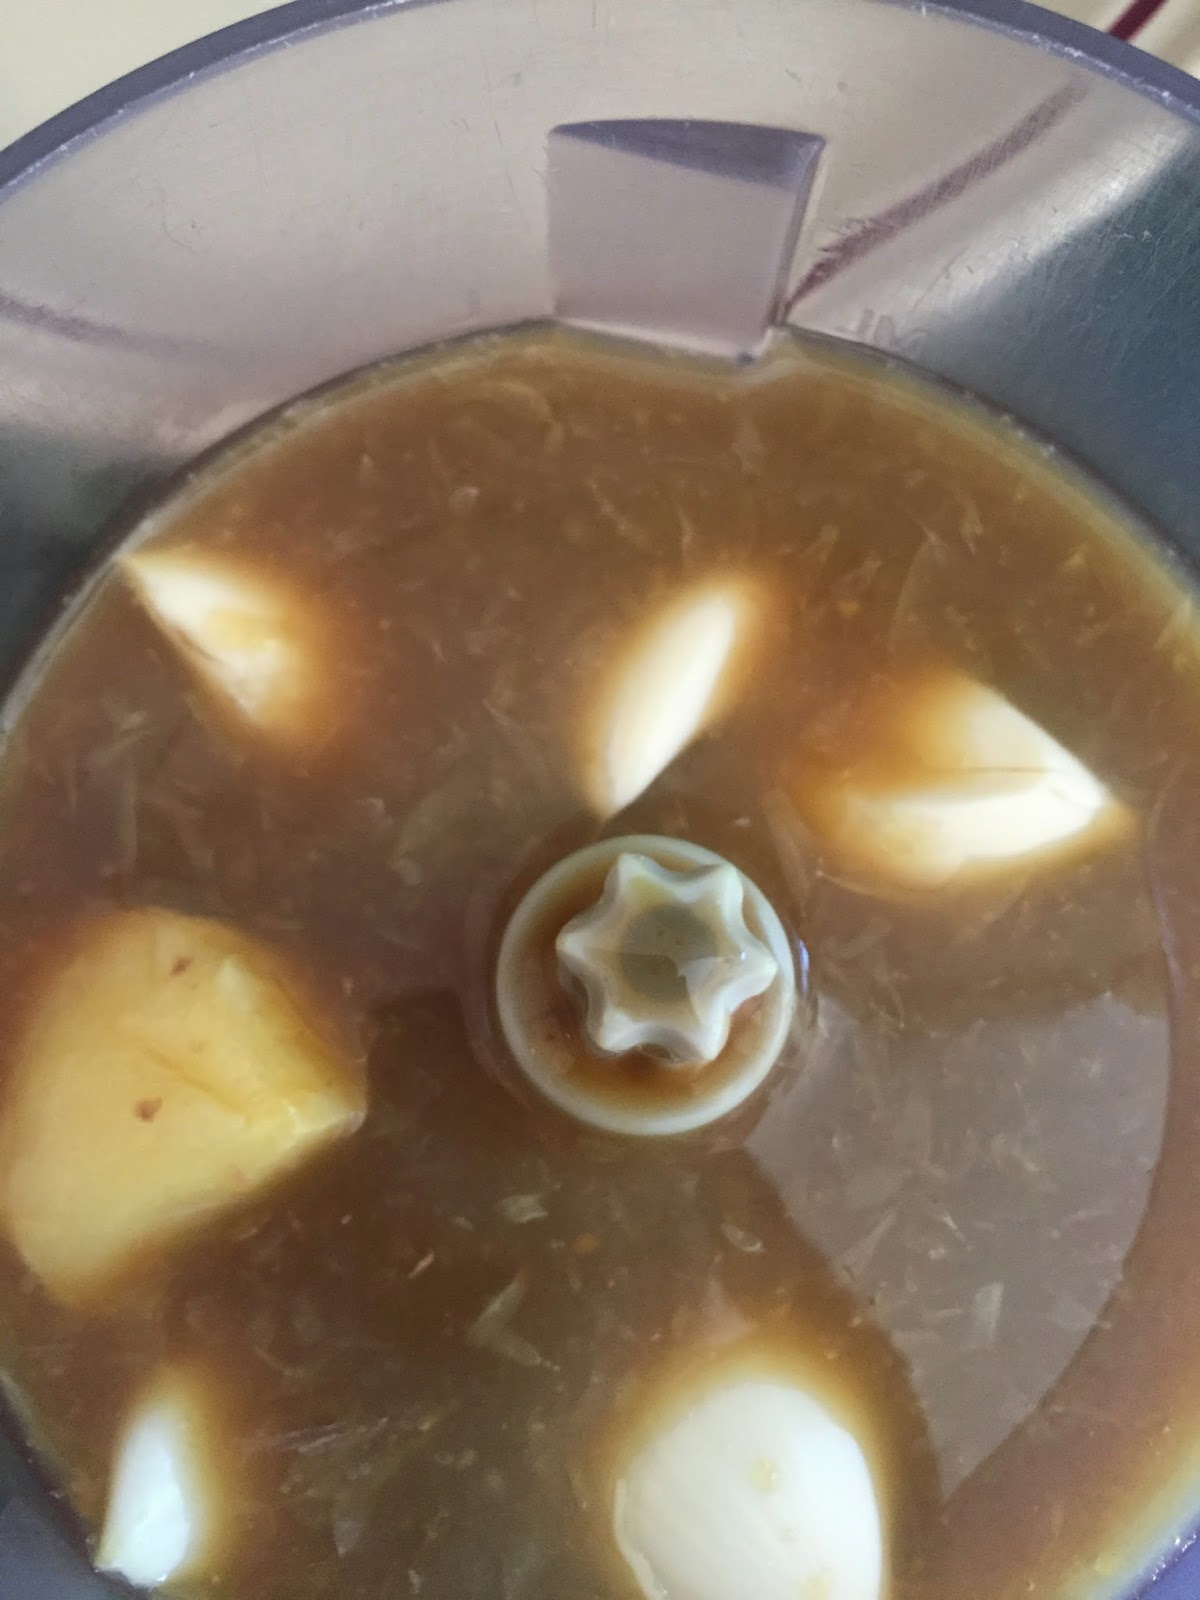
1. Make your sauce: in a food processor or blender, combine coconut aminos (soy sauce substitute), orange juice, fresh garlic, and fresh ginger. Set aside.
Use a piece of fresh, peeled piece of ginger the size of about your thumb or 1 inch.

Coconut Aminos, garlic, ginger, and orange juice about to be blended up!

2. Prep Chicken: cut about 2 lbs of boneless, skinless chicken thighs into bite sized pieces and place into a large ziploc bag. I was able to cut each chicken thigh into about 6 pieces.
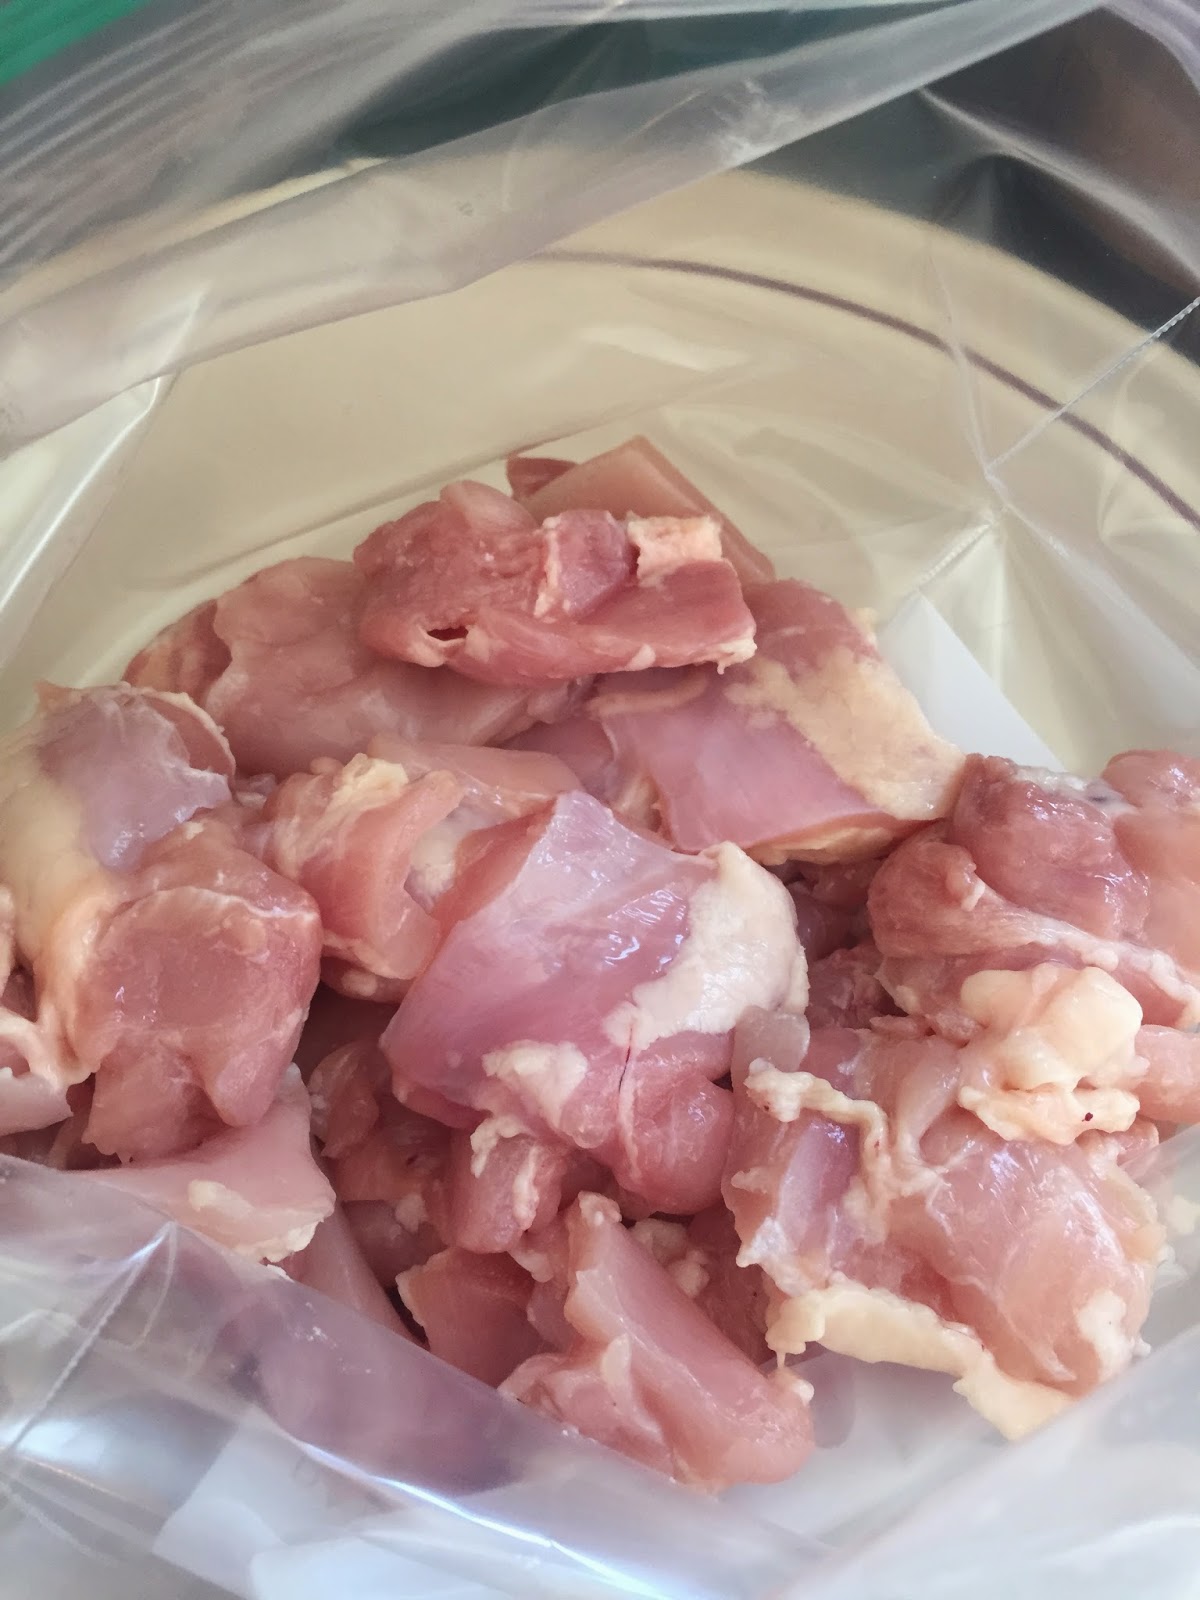
I know, raw chicken isn't pretty, but you get the idea.
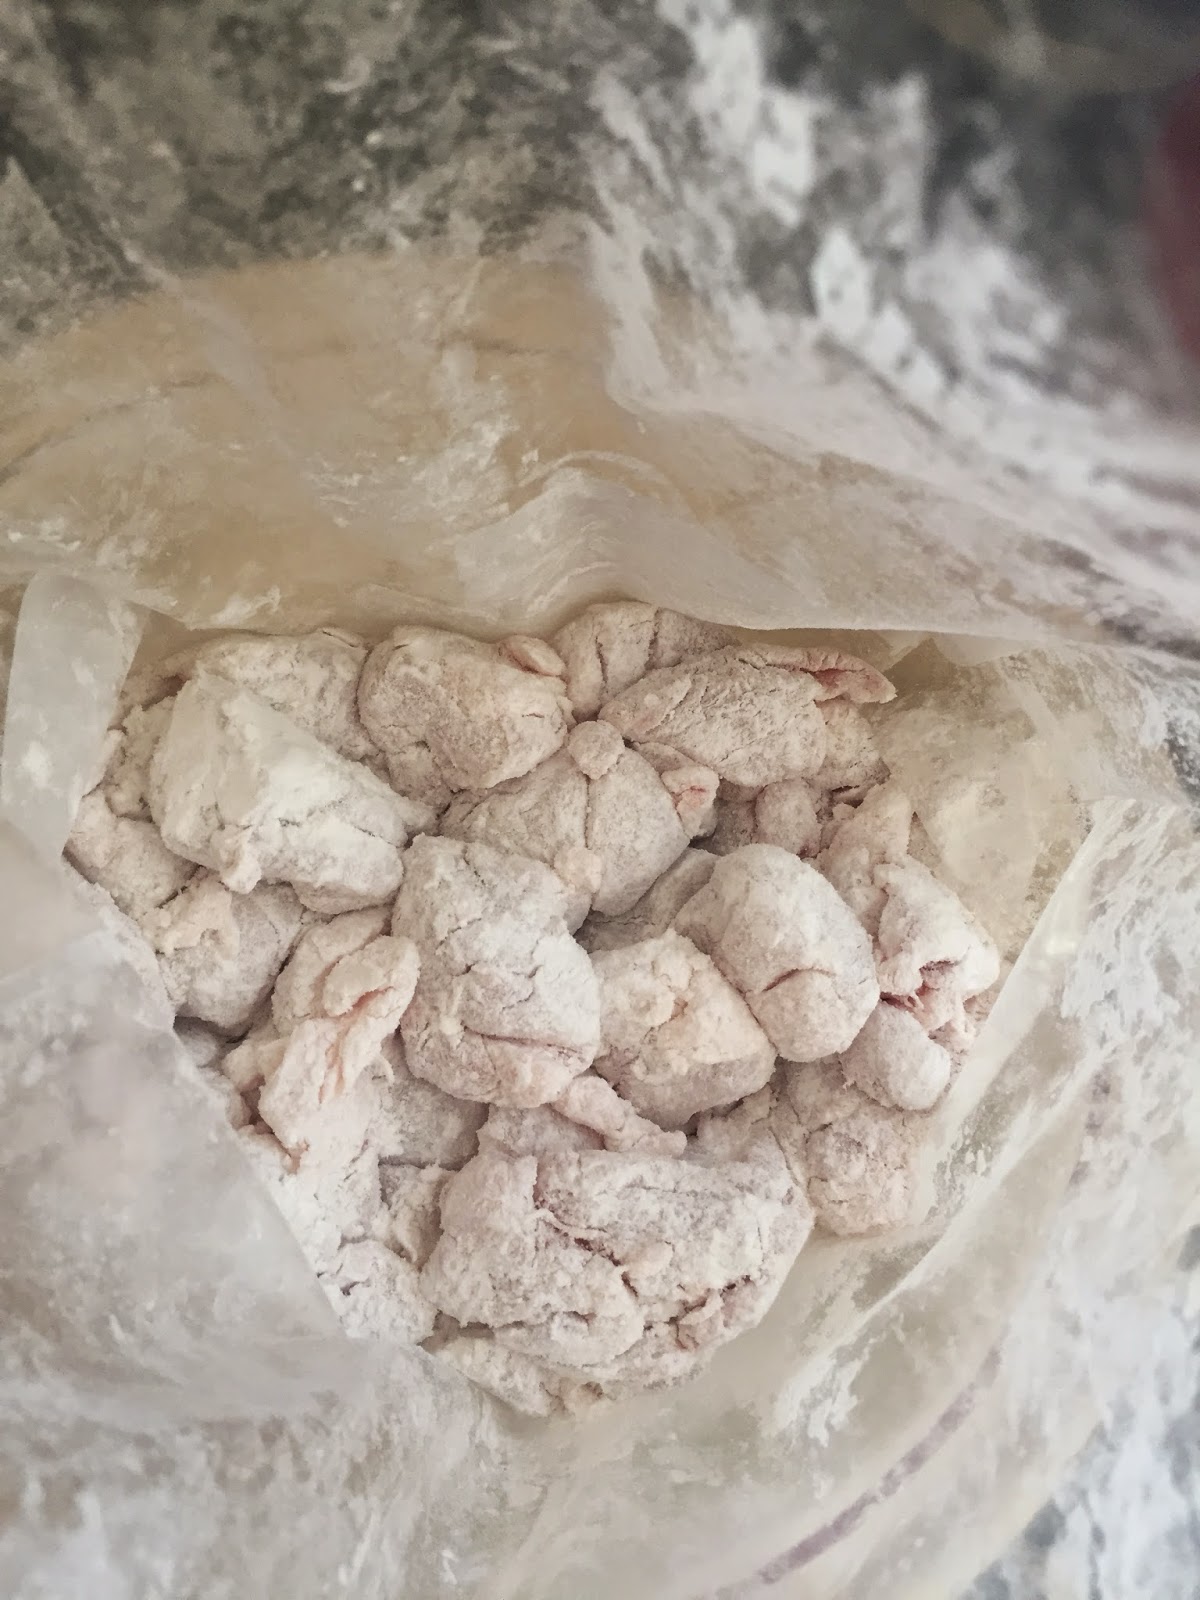
3. Coat chicken: Add 1/2 cup of arrowroot flour/starch to the chicken pieces, zip up the bag, and shake what your mama gave ya until all pieces are well coated.
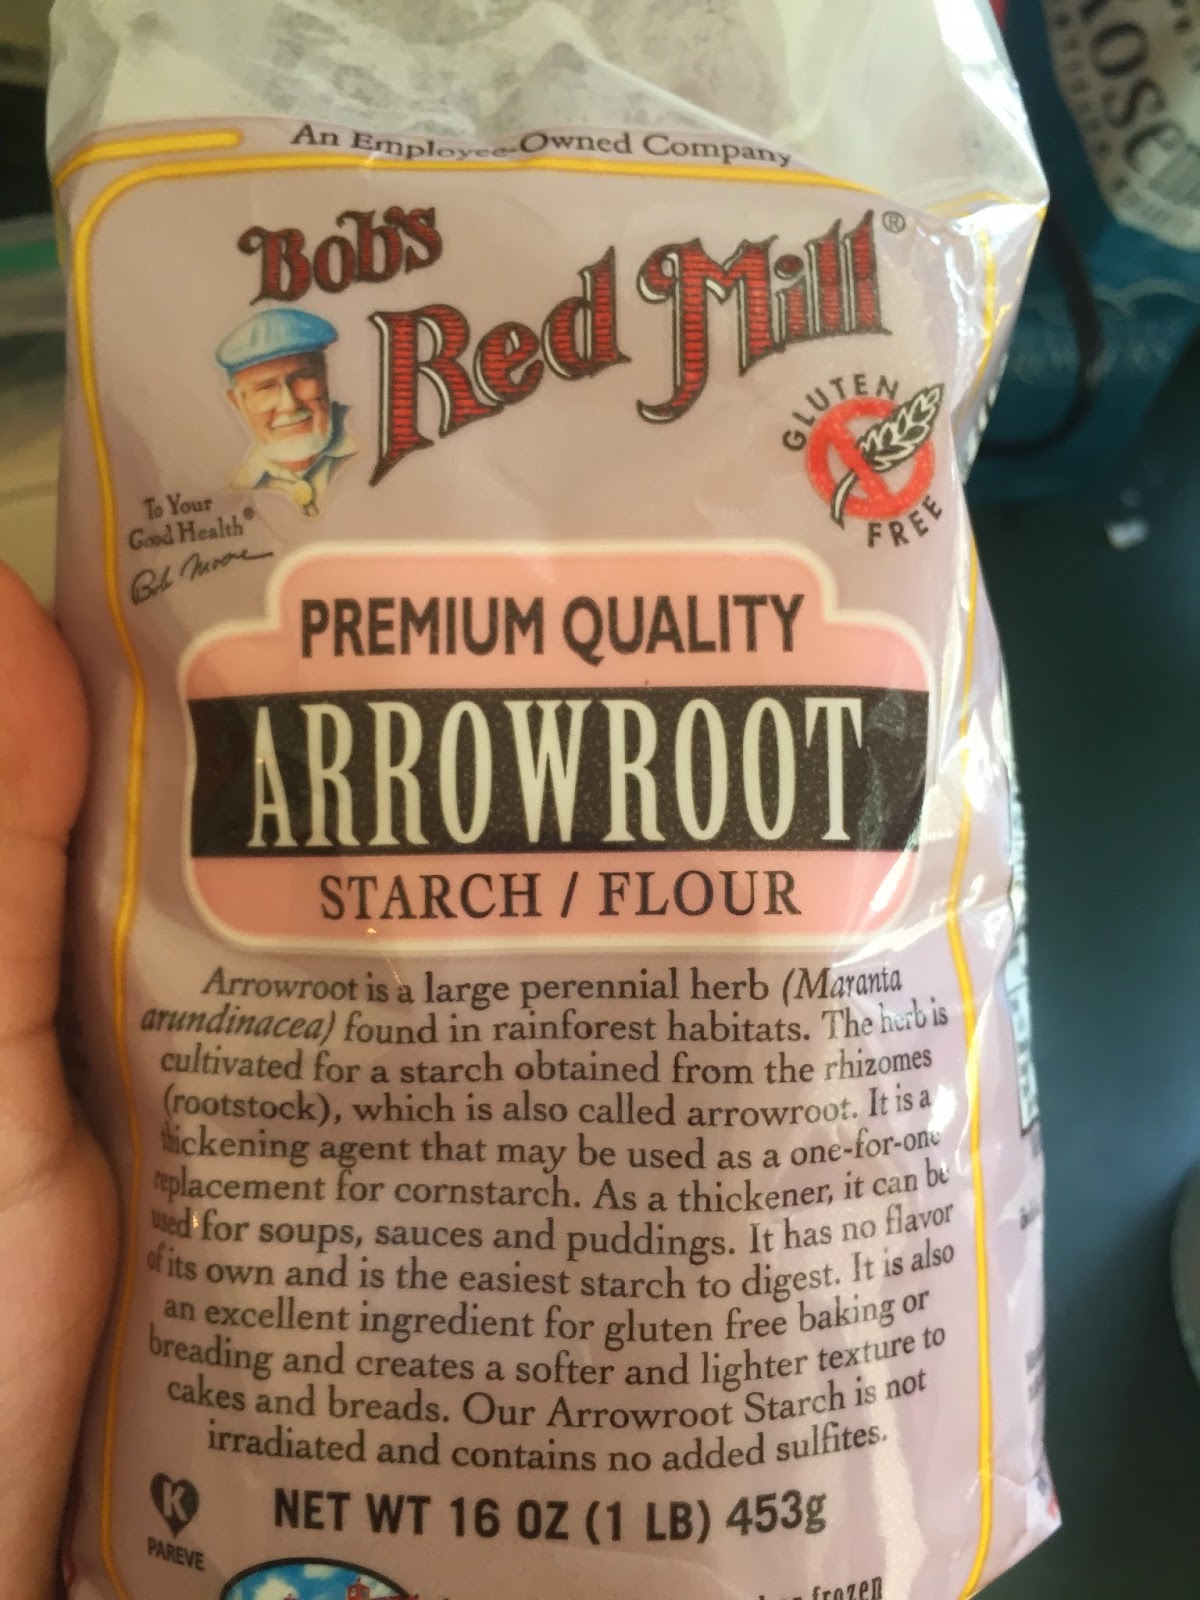
This is the kind of arrowroot flour I buy - it's relatively inexpensive compared to other flour substitutes and works perfectly for this recipe.

This is what your chicken pieces should look like after a good shake with the arrowroot flour.
4.  Heat up a bit of avocado oil (or other healthy oil of your choice) over medium to medium high heat in a large heavy pan. You want the oil pretty hot, but not burning.

5. Egg bath: While the oil is heating, in a shallow dish, beat 3 large eggs and toss the chicken pieces, in batches, to coat on all sides. Once each batch is coated with the egg, you'll want to proceed to step 6 and then back again to step 5 for each batch.

Coat each chicken piece in the egg on all sides, working in batches, and proceeding to the next step.

6. Once the oil is hot, fry each chicken piece until golden brown on each side, about 30 seconds a side. You are not trying to fully cook the chicken, just create a nice crust. Work in batches and repeat Step 5 & 6 until all pieces are fried.

You're looking for that nice golden brown, crispy but chewy crust.

Transfer each batch to a plate and continue to repeat steps 5 and 6 until all pieces are fried.
7. Clean your pan: I'm a big fan of limiting the number of pans to wash, so I recommend you carefully wipe out the pan you were working in so that you can use the same pan for the rest of the recipe.
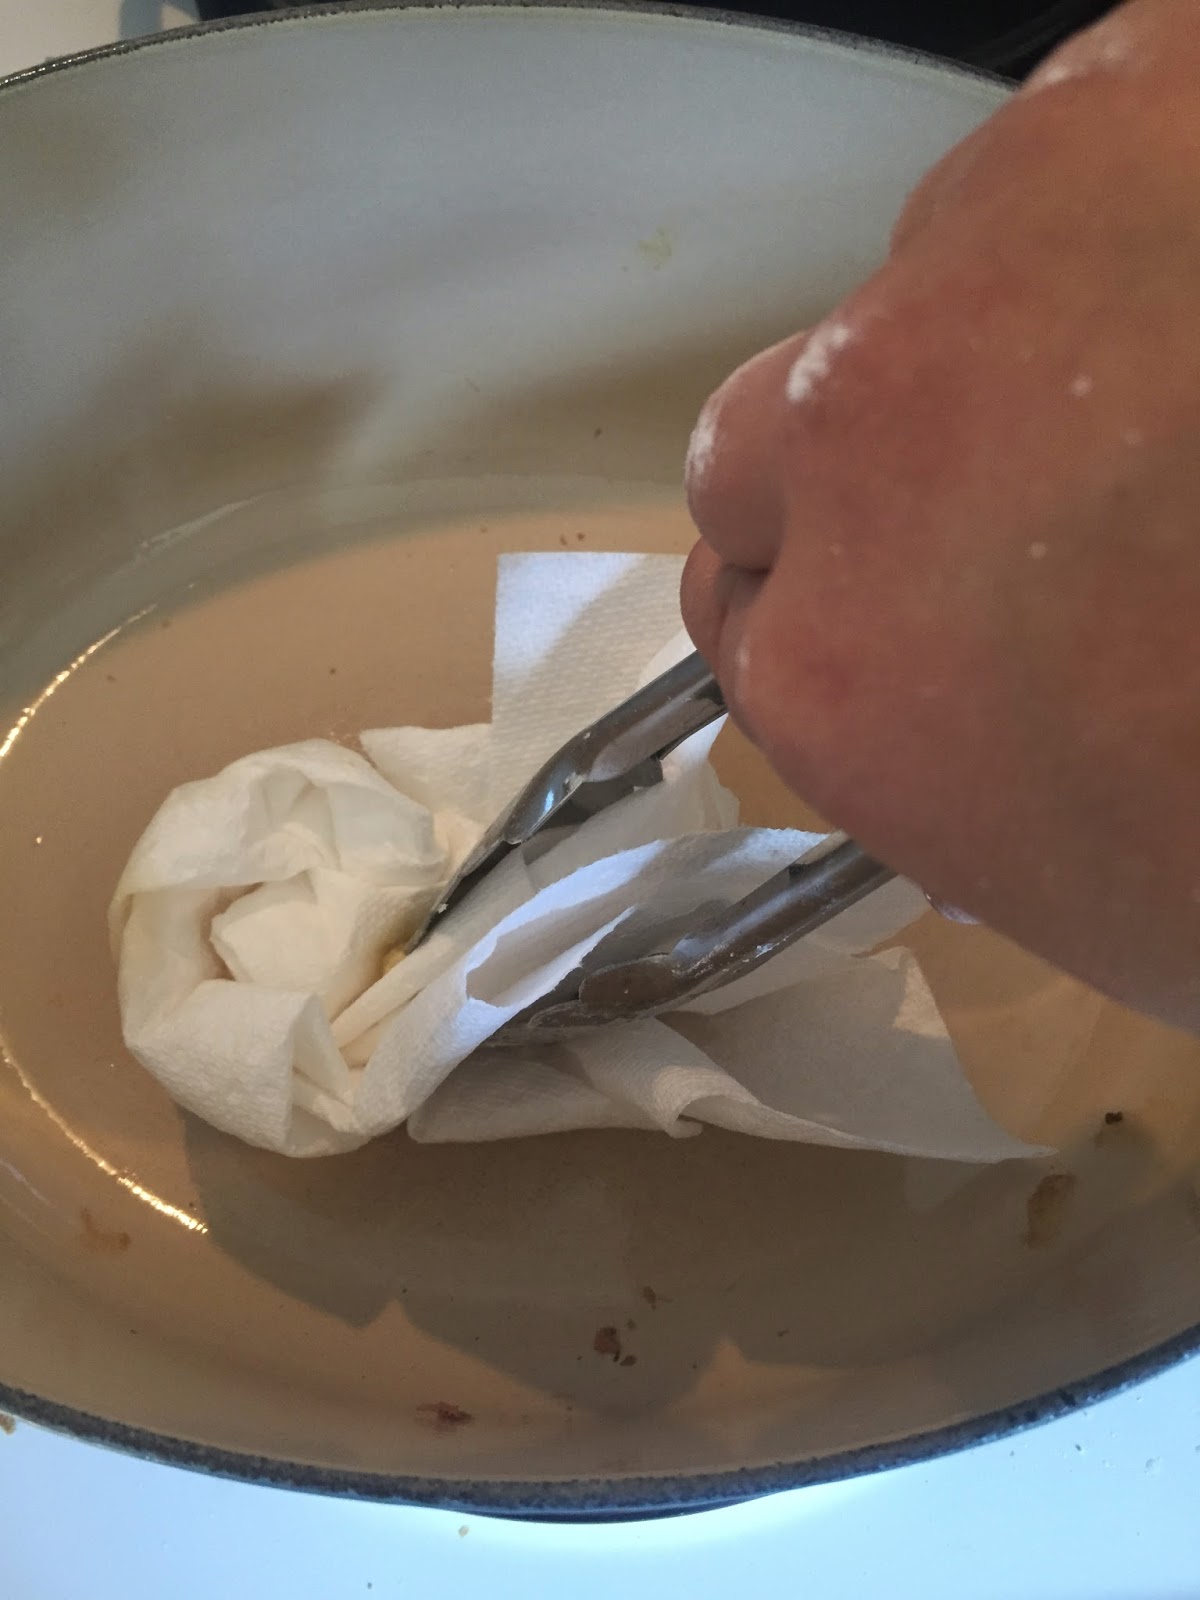
I use a pair of tongs and some paper towels to wipe out any excess oil left in the pan.
8. Combine everything: Over medium heat, pour in the sauce we created in Step 1. Let it come to a simmer and then nestle all of the fried chicken pieces back into the pan.

Fried chicken pieces simmering in the sauce.

9. Simmer and watch sauce reduce: Simmer chicken, uncovered, over medium heat for about 20 minutes, stirring occasionally, until chicken is cooked through and sauce has reduced to the nice thick sauce you would expect from Chinese takeout. Then, liberally sprinkle sesame seeds over cooked chicken.

Here the chicken is completely cooked through and the sauce has reduced to a nice thick sauce. I then sprinkled the sesame seeds all over.
10. Spoon your Paleo Sesame Chicken into a bowl with roasted vegetables or on top of a salad for a complete meal. Garnish with fresh scallions and enjoy!


Paleo Sesame Chicken Recipe

Recipe Ingredients:
1.5 - 2 lbs of boneless, skinless chicken thighs, cut into bite sized pieces
1/2 cup of arrowroot flour
3 large eggs
Avocado oil, enough to coat a pan and fry all pieces

For the Sauce:
3/4-1 cup Coconut Aminos (Use the lesser if you have 1.5 lbs instead of 2 lbs of chicken, and/or you prefer things a little less salty)
1 cup orange juice, no sugar added, all natural 
4 garlic cloves
1 inch fresh ginger, peeled, about the size of your thumb

Garnish:
Sesame seeds
Chopped fresh scallions

Recipe Directions:

1. Make your sauce: in a food processor or blender, combine coconut aminos (soy sauce substitute), orange juice, fresh garlic, and fresh ginger. Set aside.

2. Prep chicken: cut about 2 lbs of boneless, skinless chicken thighs into bite sized pieces and place into a large ziploc bag. I was able to cut each chicken thigh into about 6 pieces.

 3. Coat chicken: Add 1/2 cup of arrowroot flour/starch to the chicken pieces, zip up the bag, and shake what your mama gave ya, until all pieces are well coated.

4.  Heat up a bit of avocado oil (or other healthy oil of your choice) over medium to medium high heat in a large heavy pan. You want the oil pretty hot, but not burning.

5. Egg bath: While the oil is heating, in a shallow dish beat 3 large eggs and toss the chicken pieces, in batches, to coat on all sides. Once each batch is coated with the egg, you'll want to proceed to step 6 and then back again to step 5 for each batch.

6. Once the oil is hot, fry each chicken piece until golden brown on each side, about 30 seconds a side. You are not trying to fully cook the chicken, just create a nice crust. Work in batches and repeat Step 5 & 6 until all pieces are fried.

7. Clean your pan: I'm a big fan of limiting the number of pans to wash, so I recommend you carefully wipe out the pan you were working in so that you can use the same pan for the rest of the recipe.

8. Combine everything: Over medium heat, pour in the sauce we created in Step 1 into the cleaned out pan. Let it come to a simmer and then nestle all of the fried chicken pieces back into the pan.

9. Simmer and watch sauce reduce: Simmer chicken, uncovered, over medium heat for about 20 minutes, stirring occasionally, until chicken is cooked through and sauce has reduced to the nice thick sauce you would expect from Chinese takeout. Then, liberally sprinkle sesame seeds over cooked chicken.

10. Spoon your Paleo Sesame Chicken into a bowl with roasted vegetables or on top of a salad for a complete meal. Garnish with fresh scallions and enjoy!

Try this recipe and let me know what you think!

Until next time!

XOXO,
SMP

57 comments:

100 Days of Whole30 - Results are In!

4/08/2015 *Sara-Marie* 3 Comments

No cheats. No slips. No excuses. For 100 Days, I followed the Whole30 program and I couldn't be more thrilled by the results. Now, I'm not a newbie to the Whole30. My first adventure was in August 2012 and before this year's Whole100, I had completed 4 previous rounds. With every previous round, I would lose 5-6 pounds and then try to keep to 80/20 paleo.  Some weeks would be better than others and those 5-6 pounds would slowly creep back on - usually in the form of bloat. I decided at the end of 2014, that I wanted to REALLY make this a way of life. I REALLY wanted to change my habits for good. The last 100 days have done exactly that.

I would say the first 30 days were just like every previous round - I felt better, had clearer skin, lost 5 lbs, but I had a list of things I still craved and desired. Then around Day 40, I had another dose of the magic. Something I hadn't experienced previously. My cravings were really diminishing. I was feeling GREAT, and my body was really changing. I was actually quite surprised on Day 61 that I hadn't lost any more weight because my body looked so different. On that day, I decided to break up with the scale for good because it truly does not tell my story.

The days kept flying by and it became easier and easier to remain on plan. I turned down my mother's lasagna at a family gathering without a problem. I wasn't even tempted to eat pizza during a get together at my husband's Crossfit Box. Off plan foods just weren't even interesting anymore. I honestly craved my nutritious and delicious foods that I had made a habit of creating every day. I fell in love with red cabbage and if you're following me on Instagram you have noticed that I've eaten it almost every day since I've discovered that I loved it.

My Whole100 Results
  • I decided to not weigh myself today because for the first time in forever, I don't care what the scale says. Coming from a person who used to weigh herself multiple times a day, this is a huge victory for me. 
  • When I look at the progress photos above, I know that my body composition has changed. I'm less bloated and I'm down a dress/pants size. That tank top is an XL and I can now fit in a Medium sized shirt.
  • I lost 1 inch off my waist and 2.5 inches off my hips.
  • I've seen major progress in the gym - I've hit new PRs on my front squat and deadlift and I've been able to run during workouts without needing to take walking breaks. 
  • I've solidified these new healthy eating habits and choosing real food, all the time, is just my new normal.
People keep asking me what I'm going to do now. If I've ordered a pizza or stuffed my face with a cupcake yet. And the answer is I'm eating the same stuff I ate yesterday and the day before. It's delicious and makes me feel great - why would I go back? Sure, if someone had a delicious, freshly baked cupcake in front of my face right now, I would consider eating it. But the difference is that before, just the thought of a cupcake would trigger my cravings and I would be heading straight to the kitchen to satisfy my sweet tooth. Instead, I have no compelling feeling as I type this.

I  think I've finally taken control of my relationship with food.
It no longer controls me - I am in charge.
I am Whole30.

XOXO,
SMP

3 comments:

Blackberry Basil Balsamic Vinaigrette Recipe

4/01/2015 *Sara-Marie* 0 Comments


This Blackbery Basil Balsamic Vinaigrette recipe came about by accident. Or was it fate? My local grocery store had organic blackberries for 50% off because they were nearing their end of life. I scooped up two packages at $2.50 each and felt like I stole something.

I had seen somewhere about making a blackberry balsamic reduction so I started doing that with my half priced beauties. Once it was done, I thought it needed a little bit more life, so I started adding lemon zest, lemon juice, salt, and pepper. Yummy. Then I thought - I should totally make this into a dressing! So I pureed the reduction with light tasting olive oil until it was the consistency I was looking for.  It still needed a little something so I looked around my kitchen and my basil plant caught my eye - yes, this needed a fresh herb! So I threw in some basil leaves and pureed it again. Delicious. Next time, I will just chop the fresh basil and stir it in. I think seeing the green specks would be pretty!

If you follow me on Instagram, you probably noticed that yesterday, I topped my salad with the vinaigrette and this morning I topped my sweet potato hash and eggs with it. I think this would be delicious on meat, seafood, eggs, salad greens, veggies...anything really!


Side Note: Less than a week until I complete my Whole100! Woohoo!

Blackberry Basil Balsamic Vinaigrette Recipe

Recipe Ingredients: 

6 oz package of blackberries
1/4 cup balsamic vinegar
Zest of one lemon
Juice from 1/2 lemon
3/4 cup light tasting olive oil
Salt and pepper, to taste
8-10 fresh basil leaves

Recipe Directions:

1. Add blackberries and balsamic vinegar to a small saucepan. Smash the blackberries with a fork. Bring the mixture to a boil, reduce to simmer, and let simmer for about 8-10 minutes or until reduced by half.

2. Add blackberry balsamic reduction to a food processor or blender and add remaining ingredients on the list, except for the fresh basil. Blend until well combined.

3. Chop up the fresh basil and stir it in to the vinaigrette.

Enjoy!

XOXO,
SMP

0 comments:

Coconut Marinara Chicken Recipe

3/18/2015 *Sara-Marie* 1 Comments


If you follow me on Instagram, you would have seen me post a meal earlier this week where I added bits of coconut butter on top of a tomato sauce based dish. It looked like melted cheese and although the combo may sound weird, I couldn't believe how much I loved it. This spur of the moment decision got my wheels turning and this Coconut Marinara Chicken recipe was born.

This chicken recipe is really easy, as long as you have the right ingredients. You will want to find a clean marinara sauce (no added sugar or funky ingredients) or use your own recipe. I usually use this one from Wegmans or this one I found at Costco. 

And then of course, you will need coconut butter. This is not coconut milk, cream, or oil. Just pureed coconut flesh. My favorite brand is Artisana's which I can usually find at TJMAXX. I also like Nutiva's brand, which I'm also able to find at my local Wegmans. 

Trust me - the combination of the marinara and the coconut butter is decadently delicious. While I used the coconut marinara to top chicken in this recipe, it goes amazingly over spaghetti squash or mixed in with ground beef  or pork. Try it and let me know what you think! 

Coconut Marinara Chicken Recipe 


Recipe Ingredients: 

For the Coconut Marinara Sauce
2 cups marinara sauce (no sugar added)
1/2 cup coconut butter 

For the Chicken 
1-1.5 pounds of boneless chicken thighs
1 tsp salt
1/2 tsp pepper 
Ghee, for frying 

Toppings:
More coconut butter (because, why not?)
Fresh cilantro 

Recipe Directions:

1. Warm a cast iron pan over medium heat.

2. Season chicken thighs with salt and pepper on both sides.

3. Melt enough ghee to coat your pan and pan fry chicken thighs for about 5 minutes per side.

4. While your chicken thighs are frying up, in a small sauce pan warm up marinara sauce on medium low. Once warmed, add coconut butter and stir until melted and completely combined.

5. After the initial browning step of the chicken in step 3, lower heat to medium low, and cook an additional 10 mins or so, until chicken is fully cooked. (Juices run clear, internal temp of 165)

6. Once the chicken is cooked, remove from pan and let chicken rest for about 5 minutes on a plate. Spoon the creamy coconut marinara sauce over the chicken and top with more bits of coconut butter and fresh cilantro.

7. Enjoy!

XOXO,
SMP

1 comments:

Faith Without Action is Dead

3/01/2015 *Sara-Marie* 1 Comments


Faith is powerful, but it requires us to take action.

God's word says that if we have faith as small as a mustard seed, we could tell that mountain to move and it would move. So even if we have "enough" faith as the scripture says, we still have to TELL the mountain to move, in order for it to move. We can't just think it and believe it, we have to ACT on our faith.

These words apply to every area of our lives. When I think about my health journey, I know that I must not only have faith that I will see a change in my life, but I have to act on it. I have to ask God for wisdom every day to help me make the right decisions and then I must go and actually make those choices. We can't pray for God to help us lose weight, battle our addiction to food, and heal us of our medical conditions, if we are still binge eating on ice-cream and cookies. It's just not going to work.

So I pray today, that through this scripture you find motivation to step out of your comfort zone. To take a leap of faith. To take one action that leads you closer to your goals - whatever they may be. God promises to give you the strength to continue in this race, but you have to keep walking.

XOXO, 
SMP

1 comments:

Whole30 + Crossfit = A Year of Success!

3/01/2015 *Sara-Marie* 0 Comments


I shared this post on my Instagram account yesterday, but thought I would share here on my blog as well. The difference a year can make, my friends! This time last year, I was sitting on the sidelines, 4 months postpartum, watching my husband compete in the 2014 Crossfit Games Open. I actually felt great that day: I remember the baby taking a nice long nap that afternoon and finally having the ability to take a shower, blow dry my hair and put on some makeup. I wanted to look pretty as I cheered on my very in shape husband and socialized with all of his gym friends. When I saw someone post this picture the next day on Facebook, I remember being embarrassed. Did I really look that big? I didn't feel that big. I've always been a very confident person and think I carry weight pretty well, but I still did not like the way I looked in this photo.

I also remember talking to my husband that day and I thought he was crazy when he told me, "Next year, you will be doing it too!" YEAH OKAY HONEY. I had already started to dabble in some Crossfit workouts, but with a new baby, and my husband's crazy work schedule, it was very hard to commit to a consistent program. Around the end of June, with the help of the Kid Care program at a new Crossfit Box that opened up locally, I was able to commit to Crossfit and workout 3-4 times a week. It was such a game changer and, lo and behold, here I am. One year later, with my Rogue and Reebok gear, head band and thumbs taped ready to take on the first workout in the 2015 Crossfit Games Open.

I have God, my husband, family, friends, Whole30, and Crossfit to thank for my transformation. There's still a long way to go but I'm rejoicing in this milestone.  Wherever you are in your journey, take a moment to pat yourself on the back for every good choice you've made. For getting up early to workout. For trying a new vegetable this week. For resting when your body needed rest. All of these good choices add up and you may not see a difference today or tomorrow, but you will. I'm a different person today than I was in that first picture and I couldn't feel more blessed.

XOXO,
SMP

0 comments:

60 Days of Whole30 - Results

2/27/2015 *Sara-Marie* 5 Comments

If you've been following me on Instagram or Facebook, then you know that I have been following the Whole30 program since the end of December with a goal of reaching 100 days of Whole30. Since I have completed four separate rounds of Whole30 in the past, this experience so far has truly been a breeze. I've never felt more committed and dedicated to eating only real, nutrient dense foods than I am right now. Yes, there have been crazy days when all I have wanted was for my husband to pick up some takeout on the way home. There have also been days when I've craved a piece of chocolate. But I have been able to overcome all of the cravings by simply preparing wholesome and delicious meals and reminding myself why I am doing this program.

My past experiences with Whole30 have always been great - I've lost weight, felt less bloated, had clearer skin, slept better, and had more energy. Since my first 30 days back in August 2012, we began incorporating a Paleo lifestyle with our occasional treats for special occasions or if we just felt like having pizza, we had pizza. I maintained my weight loss for the most part, but after having my daughter at the end of October 2013, I had a lot of weight to lose again. I did two Whole30s in 2014 and began to do Crossfit. These all helped me lose about 25 pounds throughout the year, but once the holidays came around, I gained some weight back. I feel as though I completely let loose and negated all of the progress I made throughout the year. I decided to embark on a Whole100 on December 29, 2014 because I really wanted to see what an extended Whole30 program would do for me.

Let me tell you that it has been the best experience so far. Today, I'm on Day 61 and while I lost almost 6 pounds in the first 30 days, I feel as though I'm experiencing the best results now 31 days past the initial program. My body composition is definitely changing. My clothes are fitting WAY better. My bloat is gone. Today I'm actually on my monthly cycle, and I typically gain 5 pounds of water weight and look like I'm 3 months pregnant. But I don't see that in my photo today! I would love to say that I'm sleeping better - but I have an almost 16 month old that has been crazy at night. However, despite the sleep deprivation, I am able to hold it together throughout the day with more energy - so that's still a win!

The funniest part of all of this is that when I weighed myself this morning, I didn't lose one fraction of a pound since Day 30. Maybe it is because I'm on my monthly cycle and I did in fact gain some water weight that is hiding my actual weight loss. Maybe not. Some would say that means the program isn't working, but it clearly is. Look at the difference in that picture above from Day 21 and Day 61! I thank God I have been taking pictures because if I didn't see this physical proof, I probably would be feeling terrible today about not losing any more weight. But I'm not mad, I'm actually feeling great and so motivated to continue on this journey.

In fact, I may never get on the scale again. It truly doesn't tell my whole story. Who cares anyway how much force is exerted on my body by gravity? I just care about how I look and feel, and gosh darnit, I think I'm looking pretty good and feeling even better.

XOXO,
SMP


5 comments:

What Does Isabelle Eat? 2/14/15

2/14/2015 *Sara-Marie* 1 Comments


I have a lot of ideas on where to take these "What Does Isabelle Eat?" posts, but haven't had the time to put those thoughts to paper. So for this week, I will just do another recap of the meals Isabelle has enjoyed this week in hopes of giving you some healthy meal ideas that you can try in your home too.

Isabelle tried two new foods this week: wild caught salmon and red beet and cabbage sauerkraut. 

Just last week I decided to start including high quality fish into her diet. First, we tried wild caught tuna and that was a success. Based on some research I did, my plan is to feed her about one ounce, once a week, alternating between types of fish. And even though she has really enjoyed the tuna and salmon, too much in a sitting or in a given week could potentially be a lot of mercury exposure for a little body. The benefits of the healthy and brain boosting omega 3s outweighs the risk though and if we do it once a week, Isabelle should be just fine! However, we are avoiding shellfish since I have an allergy and I don't want to test that out any time soon!

Now in terms of the red beet and cabbage sauerkraut, she wasn't exactly sure if she liked it or not. Isabelle would suck and chew on the pieces and then spit them out. (Check out the video on my Instagram or Facebook page - it's hilarious!) I decided to experiment with this food since healthy bacteria that can be found in high quality fermented foods like sauerkraut can be great for your gut. Yay probiotics! This would be another once every week or two thing. Hopefully she actually eats it next time! 

SOME OF THIS WEEK'S MEALS IN PICTURES

Scrambled eggs, orange slices and avocado

Peaches, pears, and scrambled eggs

Zoodles with a creamy ground beef meat sauce

She doesn't mess around when it comes to chicken drumsticks!

Olives, avocado, chicken, and orange slices. Isabelle loves the little compartments in this repurposed muffin pan!

Beef stew, avocado, and raspberries. She LOVED those beef stew chunks!

Wild caught salmon with a little homemade mayo and cut up grapes. This was a little messy but she housed the salmon. Actually left most of the grapes.

More scrambled eggs, sweet potato rounds, and strawberries with coconut cream

Roasted vegetable soup! Made with butternut squash, carrots, sweet potato, onions, coconut milk, and bone broth.She insisted on feeding herself.

Strawberries, avocado, butternut squash, and red beet and cabbage sauerkraut.

Below is a summary of the different foods she's consumed in the last week:

Fruits: Raspberries, Bananas, Strawberries, Oranges, Apples, Grapes, Peaches, Pears  
Vegetables: Sweet Potatoes, Butternut Squash, Zucchini, Carrots, Onions, Broccoli (Does the beet and cabbage count?!)
Protein: Eggs, Chicken, Beef, Bison, Salmon   
Fats: Avocado, Coconut, Ghee
Liquids: Breast Milk, Bone Broth, Coconut Milk, Water 


What new food did your child try this week? What was their reaction? Share in the comments below! 

XOXO,
SMP


1 comments: